

How To Give Yourself An At-Home Facial
Giving yourself a facial every once in a while is such a treat for your skin and can help relieve stress! Here are my steps on how to give yourself an at-home facial!
Step 1: Cleanse. Then Cleanse Again
I often cleanse my face twice before bed to make sure my skin is super clean and able to absorb the treatments I apply. For your at-home facial, a double cleanse is essential!
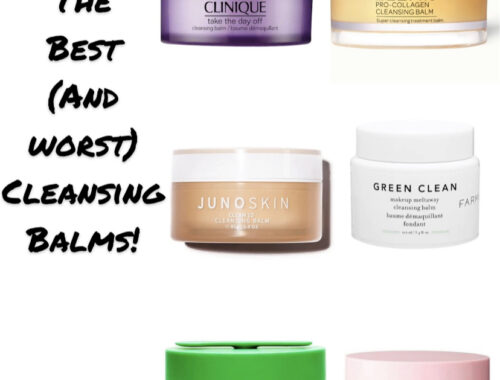
First, start with either a cleansing oil or cleansing balm on dry skin. This will loosen and remove makeup, dirt, and pollutants from the skin. If you don’t wear a lot of makeup, I recommend this cleansing oil from Maelove. If you are wearing more makeup, I recommend this cleansing balm from Elemis, which is so good at removing all makeup, including mascara. Massage the oil or balm into dry skin, taking your time. Remove the oil or balm with a damp washcloth.
Then cleanse with a liquid cleanser to remove any leftover oil/balm, makeup, and debris. Rinse with lukewarm water and pat dry. My favorite deep cleansers are this one from Kiehl’s and this one from Maelove.
Step 2: Exfoliate
This will help remove dead skin and loosen up clogged pores. For my at-home facials, I use a physical exfoliant, such as this clay one from Maelove or this more affordable option from Acure. Be very gentle around the eye area.
Step 3: Mask
Your skin can change with the seasons or with a change in hormones. Pick a mask that addresses your biggest concern. You can also use two masks for different areas of the face. For example, sometimes my cheeks feel dry and need more moisture, while my t-zone is a little oily. I’ll use a clay mask, like this one from Origins, on my forehead, nose, and chin, and then use a soothing mask, like this one, on my cheeks. Leave the mask on for 10-15 minutes, then rinse well.
Step 4: Serum
Now that your skin is super clean and smooth, it is ready to absorb your treatments. Gently massage a serum all over your face, neck, and chest. I like this vitamin C serum from Maelove, or this retinol serum from Ole Henriksen. Rub any leftover serum onto the backs of your hands.
Step 5: Oil and Moisturizer
After your serum absorbs into the skin, mix a couple of drops of facial oil into your favorite moisturizer (I like this moisturizer and this oil). Use all over face, neck, and chest, and don’t forget your hands! Apply eye cream under and around your eyes, including over your brow bones. Use your ring finger to pat the eye cream on. My favorite eye creams are this one from Fresh and this one from Beautycounter.
Don’t forget your lips! My favorite lip balms, that also happen to smell amazing, are this one from Laneige and this one from Jouer.
Step 6: Jade Roll
Once your oil and moisturizer is set, massage your face with a cooled jade or quartz roller. I place mine in the freezer for several minutes before using. Use upward and outward motions with the roller, including rolling up on your neck and around your jaw. I use this jade roller.
Now spend some time relaxing and enjoy your smooth, beautiful, soft skin! For a comprehensive guide to skincare products for all skin types and budgets, check out this post here.


1 Comment
[…] While you are in your comfy pj’s, give yourself an at-home facial! Read my post on how-to here! […]